30 KiB
uid
| uid |
|---|
| urp-docfx-hdr-output-implement-custom-overlay |
Implement an HDR Output compatible custom overlay
This page demonstrates how to create a Scriptable Renderer Feature that does the following:
- Composites the output of one camera onto another camera.
- Applies tonemapping to make the custom overlay consistent with the effects of HDR output.
This includes the shader that applies tonemapping to the overlay, depending on frame order.
Refer to Introduction to Scriptable Renderer Features and Introduction to Scriptable Render Passes for more information.
This example is split into the following sections:
- Prerequisites
- Set up the scene
- Create the custom overlay Render Pass
- Create the custom overlay Renderer Feature
- Create the custom overlay shader
- Finish the custom overlay
- Complete code samples
Prerequisites
This example assumes the following:
- The Unity project uses URP as the active render pipeline.
- The project is set up for HDR rendering with the following settings:
- The active URP Asset has Grading Mode set to High Dynamic Range.
- The active URP Asset has HDR enabled.
- The Project Settings have HDR Output enabled.
Set up the scene
For the example to work correctly, you must first set up a sample scene as shown in the following instructions.
-
Create a Cube GameObject and set its position to the origin point in the scene (X: 0, Y: 0, Z: 0).
-
Align the
Main Cameraso that the cube is clearly visible. -
Create a new camera and call it Overlay Camera.
-
Position the overlay camera to the right of the
Main Cameraand align it so the cube is clearly visible. -
Set the overlay camera Background Type property to Solid Color in the Inspector window.
-
Set the color of the overlay camera background to a clear black with the RGBA values of
0, 0, 0, 0. -
Create a render texture and call it OverlayRenderTexture. To create a render texture, go to Assets > Create > Rendering > Render Texture.
Note
: For better HDR precision, use a signed float format for the render texture format. To do this, select the render texture, then in the Inspector window change Color Format to a format with the
_SFLOATsuffix. -
Assign the overlay render texture to the overlay camera's Output Texture property. To do this, open the
Overlay Camerain the Inspector and go to Output > Output Texture and select OverlayRenderTexture from the asset list. -
Create a new Universal Renderer asset for the overlay camera and call it OverlayRenderer. To do this, go to Assets > Create > Rendering > URP Universal Renderer.
-
Select the active URP Asset, then in the Inspector window go to Rendering > Renderer List > +. Select OverlayRenderer. This adds the overlay renderer to the renderer list.
-
Select the overlay camera, then in the Inspector window go to Rendering > Renderer. Select OverlayRenderer. This sets the overlay camera to use the overlay renderer.
The scene is now ready for you to create a custom overlay with Scriptable Renderer Features.
Create the custom overlay Render Pass
To create a custom overlay that's compatible with HDR Output, you must use a Scriptable Render Pass to create the overlay. HDR Output applies tonemapping to the output of the main camera during post-processing. As a result of this, the output of the main camera and the overlay camera have different tonemapping. This render pass then occurs after post-processing to apply tonemapping to the output of the overlay camera.
To create the render pass for this example, use the following steps:
-
Create a C# script and call it
CustomOverlayRenderPass. -
In the script, remove the code that Unity inserted in the
CustomOverlayRenderPassclass. -
Add the following
usingdirectives.using UnityEngine; using UnityEngine.Rendering; using UnityEngine.Rendering.Universal; using UnityEngine.Rendering.RenderGraphModule; -
Create a new
CustomOverlayRenderPassclass that inherits from theScriptableRenderPassclass and has the attribute[SupportedOnRenderer(typeof(UniversalRendererData))].[SupportedOnRenderer(typeof(UniversalRendererData))] public class CustomOverlayRenderPass : ScriptableRenderPass { } -
Add the properties
Material passMaterialandRTHandle passOverlayTextureto the render pass, as shown below.[SupportedOnRenderer(typeof(UniversalRendererData))] public class CustomOverlayRenderPass : ScriptableRenderPass { Material passMaterial; RTHandle overlayTextureHandle; } -
Create a constructor method that takes a material as a parameter and assigns it to
passMaterial. This method also creates the profiling sampler for the render pass and sets it to run at theAfterRenderingPostProcessingevent.public CustomOverlayRenderPass(Material material) { passMaterial = material; profilingSampler = new ProfilingSampler(nameof(CustomOverlayRenderPass)); renderPassEvent = RenderPassEvent.AfterRenderingPostProcessing; } -
Add a
Setupmethod for the render pass. Use this method and parameter to create anRTHandlefrom the overlay texture as shown below. The use of anRTHandleallows theRenderPassAPI to interact with the overlay render texture.public void Setup(Texture overlayTex) { if (overlayTextureHandle != overlayTex) { overlayTextureHandle?.Release(); overlayTextureHandle = RTHandles.Alloc(overlayTex); } } -
Implement the
Disposemethod to release the overlay texture when the render pass is destroyed.public void Dispose() { overlayTextureHandle?.Release(); } -
Create two structs, one named
CopyData, and another namedPassData, which contain the properties shown below. These structs hold key properties URP needs to implement the render pass.struct CopyData { public TextureHandle source; } struct PassData { public TextureHandle source; public TextureHandle overlayTexture; public TextureHandle internalLut; public Vector4 lutParams; public Material material; } -
Add the
RecordRenderGraphmethod as shown below.public override void RecordRenderGraph(RenderGraph renderGraph, ContextContainer frameData) { }
Implement the RecordRenderGraph method
Add the code from the following steps within the RecordRenderGraph method of the CustomOverlayRenderPass class.
-
Get the post-processing, resource, and camera data from the frame data.
UniversalPostProcessingData postProcessingData = frameData.Get<UniversalPostProcessingData>(); UniversalResourceData resourceData = frameData.Get<UniversalResourceData>(); UniversalCameraData cameraData = frameData.Get<UniversalCameraData>(); -
Get the active color texture from the resource data.
TextureHandle activeCameraColor = resourceData.activeColorTexture; -
Create a texture to store the active camera color target.
RenderTextureDescriptor colorCopyDescriptor = cameraData.cameraTargetDescriptor; colorCopyDescriptor.depthBufferBits = (int) DepthBits.None; TextureHandle copiedColor = UniversalRenderer.CreateRenderGraphTexture(renderGraph, colorCopyDescriptor, "_CustomCameraColorCopy", false); -
Create a
RasterRenderPassto copy the active camera color target into the texture. The copy will be used to handle blending.using (var builder = renderGraph.AddRasterRenderPass<CopyData>("Custom Overlay Render Pass - Copy Camera", out var passData)) { passData.source = activeCameraColor; builder.UseTexture(passData.source, AccessFlags.Read); builder.SetRenderAttachment(copiedColor, 0, AccessFlags.WriteAll); builder.SetRenderFunc((CopyData data, RasterGraphContext context) => { Blitter.BlitTexture(context.cmd, data.source, new Vector4(1, 1, 0, 0), 0.0f, false); }); } -
Create another
RasterRenderPassto copy the overlay texture to the active camera color target with a custom material. This is the container for the rest of the code you add in this section of the guide.using (var builder = renderGraph.AddRasterRenderPass<PassData>("Custom Overlay Render Pass - Blit Overlay", out var passData)) { } -
Set up the properties the render pass needs to blit the overlay texture, as shown below.
using (var builder = renderGraph.AddRasterRenderPass<PassData>("Custom Overlay Render Pass - Blit Overlay", out var passData)) { passData.material = passMaterial; builder.SetRenderAttachment(activeCameraColor, 0, AccessFlags.Write); passData.source = copiedColor; builder.UseTexture(passData.source, AccessFlags.Read); } -
Import the texture into the render graph system, then set the texture as an input.
passData.overlayTexture = renderGraph.ImportTexture(passOverlayTexture); builder.UseTexture(passData.overlayTexture, AccessFlags.Read); -
Check for post-processing and HDR color grading. If the configuration is correct for HDR Output, set the internal color LUT texture HDR uses as an input, and pass its parameters to the shader.
if (postProcessingData.gradingMode == ColorGradingMode.HighDynamicRange && cameraData.postProcessEnabled) { passData.internalLut = resourceData.internalColorLut; builder.UseTexture(passData.internalLut, AccessFlags.Read); int lutHeight = postProcessingData.lutSize; int lutWidth = lutHeight * lutHeight; float postExposure = 1.0f; ColorAdjustments colorAdjustments = VolumeManager.instance.stack.GetComponent<ColorAdjustments>(); if (colorAdjustments != null) { postExposure = Mathf.Pow(2.0f, colorAdjustments.postExposure.value); } passData.lutParams = new Vector4(1f / lutWidth, 1f / lutHeight, lutHeight - 1f, postExposure); }Note
: If post processing is disabled, the HDR color conversion will be applied after this render pass and the expected colorspace for the cameras output is the default Rec709. The code in this example uses an
ifstatement here to prevent this render pass from altering the output of the overlay camera before HDR is applied. -
Set a keyword on the shader to enable tonemapping, and add a command to blit the overlay texture to the active camera color target.
builder.SetRenderFunc((PassData data, RasterGraphContext context) => { data.material.SetTexture("_OverlayTexture", data.overlayTexture); bool tonemappingActive = data.internalLut.IsValid(); CoreUtils.SetKeyword(data.material, "TONEMAPPING", tonemappingActive); if (tonemappingActive) { data.material.SetTexture("_InternalLut", data.internalLut); data.material.SetVector("_InternalLut_Params", data.lutParams); } Blitter.BlitTexture(context.cmd, data.source, new Vector4(1, 1, 0, 0), data.material, 0); });
This completes the CustomOverlayRenderPass script, ready for a Scriptable Renderer Feature to add it to a renderer.
For the complete code for this section, refer to Custom overlay Render Pass code.
Create the custom overlay Scriptable Renderer Feature
To add the CustomOverlayRenderPass to a renderer, you must create a Scriptable Renderer Feature with the following steps.
-
Create a C# script and call it
CustomOverlayRendererFeature. -
In the script, remove the code that Unity inserted in the
CustomOverlayRendererFeatureclass. -
Add the following
usingdirectives.using UnityEngine; using UnityEngine.Rendering; using UnityEngine.Rendering.Universal; -
Set up a new
CustomOverlayRendererFeatureclass that inherits from theScriptableRendererFeatureclass.public class CustomOverlayRendererFeature : ScriptableRendererFeature { } -
Add the following properties to contain the assets and data the render pass needs.
public class CustomOverlayRendererFeature : ScriptableRendererFeature { public Shader hdrShader; public RenderTexture passOverlayTexture; Material passMaterial; CustomOverlayRenderPass overlayRenderPass = null; } -
Create the
AddRenderPassesmethod, and use it to apply the overlay only in Game view and to the last camera in the camera stack.public override void AddRenderPasses(ScriptableRenderer renderer, ref RenderingData renderingData) { if (renderingData.cameraData.cameraType != CameraType.Game || !renderingData.cameraData.resolveFinalTarget) return; } -
After the
ifstatement, pass the overlay texture to the overlay render pass and enqueue the render pass.public override void AddRenderPasses(ScriptableRenderer renderer, ref RenderingData renderingData) { if (renderingData.cameraData.cameraType != CameraType.Game || !renderingData.cameraData.resolveFinalTarget) return; overlayRenderPass.Setup(passOverlayTexture); renderer.EnqueuePass(overlayRenderPass); } -
Add the
Createmethod and create an instance of theCustomOverlayRenderPasswith a new material that useshdrShader.public override void Create() { passMaterial = CoreUtils.CreateEngineMaterial(hdrShader); overlayRenderPass = new CustomOverlayRenderPass(passMaterial); } -
Implement the
Disposemethod to release the resources the renderer feature creates once it has applied the render pass.protected override void Dispose(bool disposing) { CoreUtils.Destroy(passMaterial); overlayRenderPass.Dispose(); }
For the complete code for this section, refer to Custom overlay Scriptable Renderer Feature code.
Create the custom overlay shader
The material the CustomOverlayRendererFeature creates requires a custom shader to handle the overlay and HDR Output changes. The following steps demonstrate how to create a shader capable of this.
-
Create a new shader and name it
CustomOverlayBlit. -
Delete the shader code Unity generates automatically and set up the outline of the shader as shown below.
Shader "Custom/CustomOverlayBlit" { SubShader { Tags{ "RenderPipeline" = "UniversalPipeline" } Pass { ZWrite Off ZTest Always Blend Off Cull Off HLSLPROGRAM #pragma target 2.0 #pragma editor_sync_compilation #pragma vertex Vert #pragma fragment Frag #pragma multi_compile_local_fragment _ TONEMAPPING #include "Packages/com.unity.render-pipelines.universal/ShaderLibrary/Core.hlsl" #include "Packages/com.unity.render-pipelines.core/Runtime/Utilities/Blit.hlsl" #include "Packages/com.unity.render-pipelines.core/ShaderLibrary/Color.hlsl" TEXTURE2D(_InternalLut); TEXTURE2D_X(_OverlayTexture); float4 _InternalLut_Params; #define LutParams _InternalLut_Params.xyz #define PostExposure _InternalLut_Params.w ENDHLSL } } } -
Create a method with the name
ApplyTonemappingand the return typehalf3. This method should have the following parameters:half3 input,TEXTURE2D_PARAM(lutTex, lutSampler),float3 lutParams,float exposure. -
In the
ApplyTonemappingmethod, multiplyinputby theexposurevalue, thensaturatethe modifiedinput.half3 ApplyTonemapping(half3 input, TEXTURE2D_PARAM(lutTex, lutSampler), float3 lutParams, float exposure) { input *= exposure; float3 inputLutSpace = saturate(LinearToLogC(input)); } -
Apply the tonemapping changes with
ApplyLut2Dand return the result.half3 ApplyTonemapping(half3 input, TEXTURE2D_PARAM(lutTex, lutSampler), float3 lutParams, float exposure) { input *= exposure; float3 inputLutSpace = saturate(LinearToLogC(input)); return ApplyLut2D(TEXTURE2D_ARGS(lutTex, lutSampler), inputLutSpace, lutParams); } -
Create a standard
Fragmethod as shown below. Place this method inside theHLSLPROGRAMbut after theApplyTonemappingmethod.half4 Frag(Varyings input) : SV_Target { } -
In the
Fragmethod, retrieve the original camera color and the overlay color.half4 Frag(Varyings input) : SV_Target { half4 color = FragBlit(input, sampler_LinearClamp); half4 overlay = SAMPLE_TEXTURE2D_X(_OverlayTexture, sampler_LinearClamp, input.texcoord); } -
Create an
ifstatement to check if the shader should apply tonemapping. If the shader should apply tonemapping. use theApplyTonemappingmethod to apply it to the overlay.half4 Frag(Varyings input) : SV_Target { half4 color = FragBlit(input, sampler_LinearClamp); half4 overlay = SAMPLE_TEXTURE2D_X(_OverlayTexture, sampler_LinearClamp, input.texcoord); #if TONEMAPPING overlay.rgb = ApplyTonemapping(overlay.rgb, TEXTURE2D_ARGS(_InternalLut, sampler_LinearClamp), LutParams, PostExposure); #endif } -
Blend the overlay with the original camera color and return the outcome.
half4 Frag(Varyings input) : SV_Target { half4 color = FragBlit(input, sampler_LinearClamp); half4 overlay = SAMPLE_TEXTURE2D_X(_OverlayTexture, sampler_LinearClamp, input.texcoord); #if TONEMAPPING overlay.rgb = ApplyTonemapping(overlay.rgb, TEXTURE2D_ARGS(_InternalLut, sampler_LinearClamp), LutParams, PostExposure); #endif color.rgb = color.rgb * (1.0 - overlay.a) + overlay.rgb * overlay.a; return color; }
The shader is now complete and ready for use in the CustomOverlayRenderPass and CustomOverlayRendererFeature scripts.
To see the complete code for this section, refer to Custom overlay shader code.
Finish the custom overlay
To finish the custom overlay, you must set up the scripts you've created, to apply their effects to the renderers in the scene. The following steps demonstrate how to do this.
- Find and select the main renderer the active URP Asset uses.
- In the Inspector window, select Add Renderer Feature > Custom Overlay Renderer Feature to add the
CustomOverlayRendererFeaturescript. - Assign the
CustomOverlayBlitshader to the Shader property of the custom overlay Scriptable Renderer Feature. - Assign the
OverlayRenderTextureto the Overlay Texture property of the custom overlay Scriptable Renderer Feature.
The custom overlay is now complete and should appear on top of the main camera output in Play Mode. The overlay should be tonemapped in the same way as the main camera output, with no visible difference. This should be similar to the screenshot below.
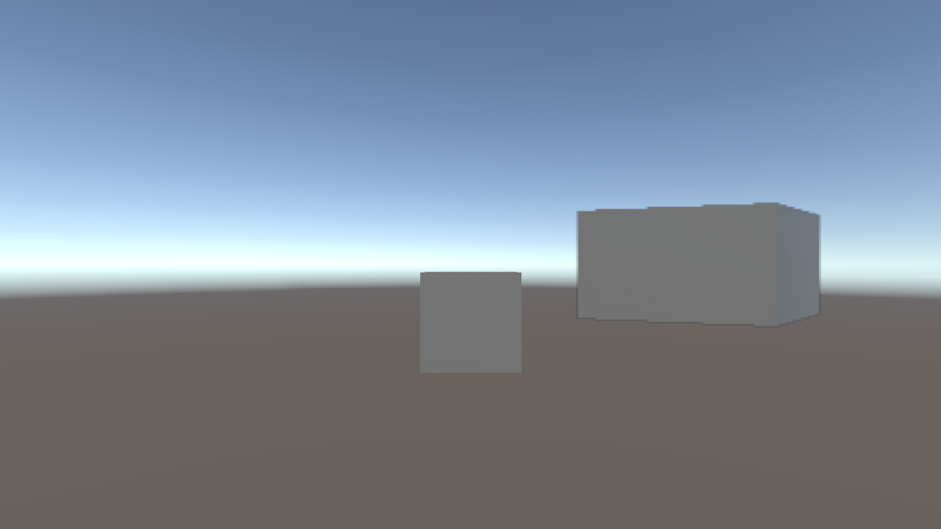
Cube in the middle of the Game view with the cube from another angle as an overlay, tonemapped to match HDR Output.
Note
: The end result might vary depending on the placement of the overlay camera.
Complete code samples
Custom overlay render pass code
The following is the complete code sample for the Scriptable Render Pass from the example.
using UnityEngine;
using UnityEngine.Rendering;
using UnityEngine.Rendering.Universal;
using UnityEngine.Rendering.RenderGraphModule;
[SupportedOnRenderer(typeof(UniversalRendererData))]
public class CustomOverlayRenderPass : ScriptableRenderPass
{
Material passMaterial;
RTHandle overlayTextureHandle;
public CustomOverlayRenderPass(Material material)
{
passMaterial = material;
profilingSampler = new ProfilingSampler(nameof(CustomOverlayRenderPass));
// The render pass is executed after post processing, so the main camera target has been tonemapped but not the overlay texture
renderPassEvent = RenderPassEvent.AfterRenderingPostProcessing;
}
public void Setup(Texture overlayTex)
{
//Create an RTHandle from the overlay texture, to import it into the render graph system
if (overlayTextureHandle != overlayTex)
{
overlayTextureHandle?.Release();
overlayTextureHandle = RTHandles.Alloc(overlayTex);
}
}
public void Dispose()
{
    overlayTextureHandle?.Release();
}
class CopyData
{
public TextureHandle source;
}
class PassData
{
public TextureHandle source;
public TextureHandle overlayTexture;
public TextureHandle internalLut;
public Vector4 lutParams;
public Material material;
}
public override void RecordRenderGraph(RenderGraph renderGraph, ContextContainer frameData)
{
UniversalPostProcessingData postProcessingData = frameData.Get<UniversalPostProcessingData>();
UniversalResourceData resourceData = frameData.Get<UniversalResourceData>();
UniversalCameraData cameraData = frameData.Get<UniversalCameraData>();
TextureHandle activeCameraColor = resourceData.activeColorTexture;
// Create a texture to copy the active camera color target into
RenderTextureDescriptor colorCopyDescriptor = cameraData.cameraTargetDescriptor;
colorCopyDescriptor.depthBufferBits = (int) DepthBits.None;
TextureHandle copiedColor = UniversalRenderer.CreateRenderGraphTexture(renderGraph, colorCopyDescriptor, "_CustomCameraColorCopy", false);
// Copy the active camera color target into the texture
using (var builder = renderGraph.AddRasterRenderPass<CopyData>("Custom Overlay Render Pass - Copy Camera", out var passData))
{
    passData.source = activeCameraColor;
    builder.UseTexture(passData.source, AccessFlags.Read);
    builder.SetRenderAttachment(copiedColor, 0, AccessFlags.WriteAll);

    builder.SetRenderFunc((CopyData data, RasterGraphContext context) =>
    {
        Blitter.BlitTexture(context.cmd, data.source, new Vector4(1, 1, 0, 0), 0.0f, false);
    });
}
using (var builder = renderGraph.AddRasterRenderPass<PassData>("Custom Overlay Render Pass - Blit Overlay", out var passData))
{
passData.material = passMaterial;
builder.SetRenderAttachment(activeCameraColor, 0, AccessFlags.Write);
passData.source = copiedColor;
builder.UseTexture(passData.source, AccessFlags.Read);
// Import the overlay texture that will be copied onto the camera color, and set it as an input
passData.overlayTexture = renderGraph.ImportTexture(overlayTextureHandle);
builder.UseTexture(passData.overlayTexture, AccessFlags.Read);
// If post-processing is enabled on the main camera, apply the tonemapping to the overlay texture as well
// If post processing is disabled, the HDR color conversion will be applied after this render pass and the expected colorspace for the cameras output is the default Rec709
if (postProcessingData.gradingMode == ColorGradingMode.HighDynamicRange && cameraData.postProcessEnabled)
{
// Import the internal color LUT texture used for HDR color grading and tonemapping
// This includes any HDR color conversion URP needs for the display, so the output of the camera is in the display's color gamut
passData.internalLut = resourceData.internalColorLut;
builder.UseTexture(passData.internalLut, AccessFlags.Read);
// Pass LUT parameters to the shader
int lutHeight = postProcessingData.lutSize;
int lutWidth = lutHeight * lutHeight;
float postExposure = 1.0f;
ColorAdjustments colorAdjustments = VolumeManager.instance.stack.GetComponent<ColorAdjustments>();
if (colorAdjustments != null)
{
postExposure = Mathf.Pow(2.0f, colorAdjustments.postExposure.value);
}
passData.lutParams = new Vector4(1f / lutWidth, 1f / lutHeight, lutHeight - 1f, postExposure);
}
builder.SetRenderFunc((PassData data, RasterGraphContext context) =>
{
// Pass parameters to the shader
data.material.SetTexture("_OverlayTexture", data.overlayTexture);
// Set a keyword on the shader to enable tonemapping
bool tonemappingActive = data.internalLut.IsValid();
CoreUtils.SetKeyword(data.material, "TONEMAPPING", tonemappingActive);
if (tonemappingActive)
{
data.material.SetTexture("_InternalLut", data.internalLut);
data.material.SetVector("_InternalLut_Params", data.lutParams);
}
// Blit the overlay texture onto the camera color
Blitter.BlitTexture(context.cmd, data.source, new Vector4(1, 1, 0, 0), data.material, 0);
});
}
}
}
Custom overlay Scriptable Renderer Feature code
The following is the complete code sample for the Scriptable Renderer Feature from the example.
using UnityEngine;
using UnityEngine.Rendering;
using UnityEngine.Rendering.Universal;
public class CustomOverlayRendererFeature : ScriptableRendererFeature
{
public Shader hdrShader;
public RenderTexture passOverlayTexture;
Material passMaterial;
CustomOverlayRenderPass overlayRenderPass = null;
public override void AddRenderPasses(ScriptableRenderer renderer, ref RenderingData renderingData)
{
// Render the overlay onto the main camera during Game view rendering only, for the last camera in the camera stack
if (renderingData.cameraData.cameraType != CameraType.Game || !renderingData.cameraData.resolveFinalTarget)
return;
// Pass the overlay texture at runtime in case it changes
overlayRenderPass.Setup(passOverlayTexture);
// Enqueue the render pass to be executed
renderer.EnqueuePass(overlayRenderPass);
}
public override void Create()
{
// Create a blit material from the given shader
passMaterial = CoreUtils.CreateEngineMaterial(hdrShader);
// Create the render pass
overlayRenderPass = new CustomOverlayRenderPass(passMaterial);
}
protected override void Dispose(bool disposing)
{
// Destroy the render pass resources
CoreUtils.Destroy(passMaterial);
overlayRenderPass.Dispose();
}
}
Custom overlay shader code
The following is the complete code sample for the shader from the example.
Shader "Custom/CustomOverlayBlit"
{
    SubShader
    {
        Tags{ "RenderPipeline" = "UniversalPipeline" }

        Pass
        {
            ZWrite Off ZTest Always Blend Off Cull Off

            HLSLPROGRAM
                #pragma target 2.0
                #pragma editor_sync_compilation
                #pragma vertex Vert
                #pragma fragment Frag
                #pragma multi_compile_local_fragment _ TONEMAPPING

                #include "Packages/com.unity.render-pipelines.universal/ShaderLibrary/Core.hlsl"
                #include "Packages/com.unity.render-pipelines.core/Runtime/Utilities/Blit.hlsl"
                #include "Packages/com.unity.render-pipelines.core/ShaderLibrary/Color.hlsl"

                TEXTURE2D(_InternalLut);
                TEXTURE2D_X(_OverlayTexture);

                float4 _InternalLut_Params;

                #define LutParams _InternalLut_Params.xyz
                #define PostExposure _InternalLut_Params.w

                half3 ApplyTonemapping(half3 input, TEXTURE2D_PARAM(lutTex, lutSampler), float3 lutParams, float exposure)
                {
                    input *= exposure;
                    float3 inputLutSpace = saturate(LinearToLogC(input)); // LUT space is in LogC
                    return ApplyLut2D(TEXTURE2D_ARGS(lutTex, lutSampler), inputLutSpace, lutParams);
                }

                half4 Frag(Varyings input) : SV_Target
                {
                    // Get the original camera color
                    half4 color = FragBlit(input, sampler_LinearClamp);

                    // Get the overlay color
                    half4 overlay = SAMPLE_TEXTURE2D_X(_OverlayTexture, sampler_LinearClamp, input.texcoord);

                    // Tonemap the overlay
                    #if TONEMAPPING
                    overlay.rgb = ApplyTonemapping(overlay.rgb, TEXTURE2D_ARGS(_InternalLut, sampler_LinearClamp), LutParams, PostExposure);
                    #endif

                    // Blend overlay and color
                    color.rgb = color.rgb * (1.0 - overlay.a) + overlay.rgb * overlay.a;
                    return color;
                }

            ENDHLSL
        }
    }
}